Showing posts with label Container garden. Show all posts

April 21, 2012

A Simple and Sweet Lavender Container

Flowers spilling out of a container add instant charm to a garden. However, I'm not the best model of how to tend containers that require trimming, watering and feeding. Over the last several years, I've opted toward a more permanent solution by using drought-tolerant, water-wise perennials. With this approach, it takes a bit longer for the container to mature. Patience, but little work is required once my containers are planted.

While shopping at Big Bloomers Flower Farm in Sanford, North Carolina, I fell for a sweet planter that was too French for me to pass up. I purchased the planter (it was on sale for 30% off). I chose a variegated lavender, lavendula x intermedia 'Silver Edge' that should mature at twenty-four inches high in bloom—what I consider the right scale for this planter.

The lavender is just a sprig right now, but I have visions of purple blooms at the end of the wands. Being a water-wise plant, I won't have to fuss over the container to keep it looking good. The fragrant foliage is a wonderful thing to brush with my fingers when I go onto the front porch. Although I am planting the lavender in a container, it is deer and rabbit resistant should you choose to plant it in a sunny, dry space in your garden.

Rated for zones 6-9 (according to the tag), 'Silver Edge' is well-suited for my zone 7b garden. I will let it over-winter on the covered porch to keep the container from freezing and thawing during winter rains.

Given that birds, especially Carolina Wrens love to nest in my planters, I added gravel to the top of the soil. Wanting a dash of color, I spray painted ordinary crushed gravel with purple—to coordinate with the future lavender blooms. Sure enough, I saw the Wren checking out the container this morning! She rejected the lavender pot as a nesting site when she realized the rock was a deterrent.


I put the gravel in a square plastic pot with holes in the bottom. I shook out the excess dirt, then sprayed the gravel. I kept shaking and spraying to cover throughly. I let the paint dry, but kept shaking the container several times while I was out gardening. This kept the gravel pieces from sticking together.


For now, I have to use my imagination for the future of this container. I'm pretty happy with the dream!

The pale green color and the design (a season on each side)
reminded me of France, so I had to plant a lavender in this pot!
I will rotate the pot as the seasons change for this perennial.
Gravel, spray painted purple for a splash of color,
deters the birds from nesting and squirrels from digging.

Words and photos by Freda Cameron, Defining Your Home, Garden and Travel. Deer and rabbit resistance varies based upon the animal population and availability of food. All company or product or patented names mentioned are registered trademarks, copyrights, or patents owned by those respective companies or persons.

April 28, 2011

Before and After: From Driveway to Gravel Garden

Sometimes it takes years of thinking before making a big change.

The area of disappointment was supposed to be a guest parking area separated from our concrete parking pad with an island garden bed. On the other side, there was just a narrow strip of garden due to the installation of a dry stream, necessary after torrential rains washed out all of the original driveway gravel in our first year.

No matter what we planted on either side, the area just never looked inviting because the plants struggled. It's a difficult site for plants. A hot, southwest exposure, but too wet in winter for drought-tolerant plants, led to losses every year. Replant. Repeat. Something else had to be done!

BEFORE: (View from driveway)
Starting in 2005, we tried plantings on either side.
Photo is from 2008 and the third iteration of failed plantings.

In 2010, we began removing plants in preparation for this big project. We weren't sure exactly what we would do. We drafted many ideas on paper and I searched through volumes of garden and landscape books and magazines. We thought about raised beds and a formal parterre, but that would eliminate the parking area. 


Out of our 2010 ideas, we decided to extend the row of hollies (ilex cornuta 'dwarf Burford') along our garage wall to form a hedge along the concrete side of the island bed. When the new hollies reach the size of the existing hollies, we'll have a nice "green fence" to serve as a backdrop.


Throughout our travels to Europe, we realized that in many areas, unable to grow lawns due to lack of rainfall, gravel is used throughout garden areas. Drought-tolerant plants were "mulched" with gravel. There is often no separation between garden/yard, parking areas and entertainment areas. The gravel covers the ground, integrating all the elements. The result is a simplified design.

Gravel is permeable, allowing rain water to reach the soil beneath. With land properly graded, the gravel doesn't wash away during rainstorms. Selecting a locally quarried gravel reduces the cost as well as making the selection "green" since it is not hauled in on trucks from long distances.

Garden inspiration:
Gravel used to integrate garden, path and patio.
Tractors drive on the gravel for tending this garden
at Chateau Val Joanis in France.
April 2011.
Returning from France on April 17, we decided to tackle this project once and for all. I pulled out an English garden magazine that had more photos of gardens mulched with gravel. We hopped in the truck and drove a few miles to our local provider of gravel. We decided to use the same driveway gravel that is standard in our neighborhood so that we wouldn't have to seek approval from our Homeowner's Association. The blue-beige gravel works well next to our sidewalk flagstone and the river rock used in the dry stream and French drain. Our French drain, installed in March 2010, was necessary to prevent erosion of our driveway gravel.

We arranged for screenings, a finely ground gravel, to be delivered (by dump truck). We used the screenings to build up the grade and level the area (with slope for drainage) to prepare for the blue gravel.

BEFORE: (View from front sidewalk)
Gravel parking area after plants
removed from each side.
 Landscape fabric pinned to the ground for patio installation.
April 20, 2011.
For the area to be welcoming, we installed a patio made of pre-formed concrete squares (16 inches square) on top of landscape fabric (to prevent weeds) and the graded screenings.

Opposite the patio, across the "parking area" section, I planted a row of rosemary to make a fragrant, low hedge. Rosemary is often used in xeric settings and can take the sun. The gravel will actually help prevent rotting of the drought-tolerant plant. I dug a trench, mixed in soil, gravel and compost before planting the rosemary in their biodegradable pots.

Once the patio was installed and we had graded the rest of the area with the screenings, we had a dump truck deliver the driveway gravel.

We raked the gravel around the new rosemary and the existing buddleia, hollies (future hedge backdrop), crepe myrtle and large, oakleaf holly.

This project solves a number of problem for us. It reduces maintenance of the area while unifying the garden, driveway and guest parking area. The simplicity of the design cleans up the entrance to our house, making it apparent that guests should enter at the front of the house instead of the side door. Finally, the materials used minimize plant watering while allowing rainwater to soak into the soil below the gravel.

AFTER: Gravel used to integrate parking with garden.
Small patio installed for a welcoming bench and containers of xeric plants.
Space to park a car.
Just waiting for the holly hedge to grow to full size.
April 28, 2011.
AFTER: (View from driveway)
Note the hollies against the garage wall.
The same hollies are planted behind the bench area and
will eventually create a green hedge.
April 28, 2011
With all of this gravel, there needed to be a "welcome" area. We moved an existing bench to the patio and collected our spare containers. We had two matching containers for each side of the bench, so we purchased two more to make a trio of planters on each side of the bench. We used a square stepping stone (on hand) to elevate an existing container to make it higher than the urn container. (I will pick up a round stepping stone on my next trip to a garden store to make the elevation material less noticeable.)

In the largest, elevated container, I planted blue point juniper (juniper chinesis 'Blue Point') because it is drought-tolerant and does well in containers. Since the juniper is suitable for zones 4-9, it can handle our cold winters in zone 7b, without being taken indoors. Someday, the juniper may outgrow the containers, but that will be many years. Juniper is deer resistant unless there is a shortage of winter food. Being evergreen, I don't expect a problem with regrowth if there is any nibbling.

The urn containers were planted with English lavender (lavandula angustifolis). Again, for drought-tolerance and cold-tolerance, this plant is suitable for zones 5-9. Lavender is deer resistant.

Finally, the low "bowl" containers were planted with succulents. I used "hens and chicks" (sempervivum) and sedum as my experience with these for container plantings in 2010 were quite successful, having wintered well and required minimal water and no replanting for 2011.

This project took about 8 hours of time with two of us working. Raking screenings and gravel was tiring, heavy work, but easily a DIY project. We used four yards of screenings and five yards of gravel because it extends onto the driveway. We will use another five yards of gravel to finish dressing the entire driveway.

The patio, made of pre-cast squares, didn't require special skill beyond leveling. We minimized the expense by using existing containers and bench and using local sources for the all materials.

While I would like to paint these containers and bench in colorful colors to hide the bland brown, that idea was vetoed by my husband! I think a deep purple, matching the lavender blooms, would look great on the urns, don't you?

Containers of drought-tolerant plants
include 'Blue Point' Juniper, English lavender
and sempervivum with sedum.


Words and photos by Freda Cameron, Defining Your Home, Garden and Travel. All company or product or patented names mentioned are registered trademarks, copyrights, or patents owned by those respective companies or persons.

January 1, 2011

Garden Plants: Best Performance in 2010

Best Perennial in a Leading Role
Agastache 'Cotton Candy'

Agastache 'Cotton Candy' never stopped blooming from April until frost. Gotta love it! Healthy and robust, I tried pinching it back, cutting it back and leaving it alone. No matter what I did, this agastache was happy all through the first growing season in my garden. Ignored by deer and rabbits, agastache is loved by bees and butterflies. This variety survived more than 90 days of 90 degree temperatures with little water!

Agastache 'Cotton Candy' from Terra Nova Nurseries, Inc.


Best Perennial in a Supporting Role
Creeping Perennial Heliotrope 'Azure Skies'

Once again, heliotropium amplexicaule 'Azure Skies' from the Southern Living® Collection is the best ground-covering perennial that never stops blooming, rewarding you with Six Months of Bloom from One Perennial. The growth habit is low and it quickly covers several feet of ground. Cut it back to keep it from getting leggy, or let it grow, let it grow! 'Azure Skies' thrives in drought and is hated by deer and rabbits.

Heliotropium amplexicaule 'Azure Skies'
blooms for six months


Best Makeup
Leucanthemum 'Broadway Lights'

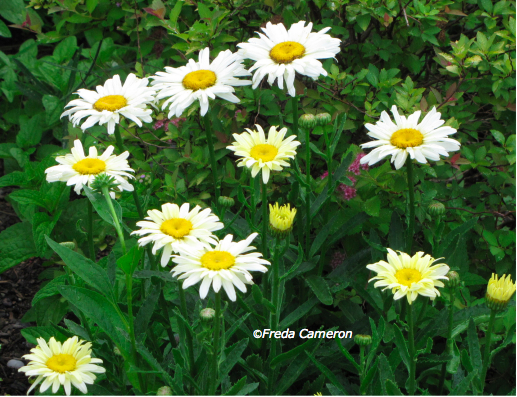
From pale yellow to white blooms on the same plant, the shasta daisy 'Broadway Lights' provides soft lighting along the garden path. Evergreen foliage (in my zone 7b) and ignored by deer and rabbits throughout the bloom season, this is a perennial worth growing. The short stature and straight stems make this perennial a great edger.

The blooms change colors on
Leucanthemum 'Broadway Lights'


Best Costume
Salvia guaranitica 'Black & Blue'

The hummingbird favorite, salvia 'Black & Blue' is dressed in the perfect blue that works with almost all other color combinations. Plant it with yellow, pink, white, red and even orange—the deep blue blooms are the perfect color companion. Resistant for those with deer (some nibbles) and rabbits, this long-blooming tender perennial is worth planting as an annual if it doesn't winter over for you.

The versatile deep blue of salvia guaranitica 'Black & Blue'
works with almost any other bloom color.


Best Visual Effects
Nigella damascena 'Miss Jekyll Blue'

Although nigella (love-in-a-mist) is an annual in most zones, this prolific self-sowing plant will return if you let it go to seed. The unusual blooms are almost out-of-this-world and they bloom for weeks and weeks. Then, the seedpods are decorative until they dry and burst open to sow the seeds. Plant almost anytime the ground isn't frozen in early spring through fall. Deer and rabbit resistant.

Sow nigella from seeds.


Best Foreign Perennial
iris ensata (Japanese iris), iris siberica (Siberian iris), and iris x Hollandica (Dutch iris)

The gorgeous blooms of iris are a "must" for my garden and I use Japanese, Siberian and Dutch for blooms from April through June. The foliage of the Japanese and Siberian iris also provide structure even when the there are no blooms. Deer will nibble the open blooms, so if you have a lot of traffic, cut the irises to use for flower arrangements. These perennials make it through the summer drought and can be divided in fall and transplanted. They are fine through winter wetness and I grow them in a rain garden and dry stream.

Delicate bloom on a tough plant.

Best Script
container garden of succulent plants

The summer of 2010 brought 90 days of temperatures over 90 degrees. I was very glad that I planted several containers based on plants, such as sempervivum, that require very little water. This succulent container looked great throughout the summer and is now over-wintering on my covered front porch where the plants receive morning sun and are protected from north and west winds.


Low-maintenance and water-wise succulent container garden.

Best Sound Effects
Joe Pye Weed 'Little Joe'

The best buzz in the garden was around the Joe Pye Weed 'Little Joe'. The butterflies and bees were drawn to the beautiful blooms. The deer and rabbits left the perennial alone and the height is a manageable four feet. I will not be without this perennial for the butterfly garden. It is a great companion for ironweed and milkweed.

Joe Pye Weed 'Little Joe' created a buzz in the garden!

Best Short Subject
Cranesbill geranium 'Rozanne'

In the third year, she leaped! My perennial geranium 'Rozanne' was quite the performer, blooming at the feet of my roses among salvias and coneflowers. Although I have to protect her from both deer and rabbits, Rozanne has earned a permanent place in my cottage garden. With a bit of trimming to keep her shape, the blooms continued throughout the summer.

Geranium 'Rozanne' is a great edging perennial.

Best Cinematography
A random mix of annuals and perennials

My "meadow madness"  proved to be a rewarding experiment. I have sown annual seeds, again at random—in colors of blue, purple, pink and white to attempt to repeat the scheme for spring 2011. Larkspur, cornflowers, agastache, poppies, verbena and rose campion are the major players for the meadow mix.

My "meadow mix" is a random sowing of
annuals to provide color among perennials that bloom later.


Check out the best performers from previous years in my zone 7b, North Carolina garden:

Best Performance in 2009
Best Performance in 2008

Words and photos by Freda Cameron, Defining Your Home, Garden and Travel. Deer and rabbit resistance varies based upon the animal population and availability of food. All company or product or patented names mentioned are registered trademarks, copyrights, or patents owned by those respective companies or persons.

May 2, 2010

Build a Bouquet of Flowers


There are now enough perennials in my garden that I've overcome my reluctance to cut the blooms to use indoors. Creating a colorful bouquet brings a sense of satisfaction. Doing so is even more fun when giving the bouquet to someone else. I carried this bouquet to a dear neighbor who hosted a neighborhood gathering.

All flowers used in my bouquet are perennials from my zone 7, full sun, deer resistant garden. None of these plants are protected with deer fences or repellents. However, the rabbits will occasionally nibble Dutch iris foliage or the chives.
False Indigo (Baptisia australis)
Dutch Iris (iris x hollandica)
Catmint (Nepeta 'Six Hills Giant')
Flowering Onion (Allium aflatunenense 'Purple Sensation')
Culinary Chives (Allium schoenoprasum)
Stick Verbena (verbena bonariensis)
Yarrow (probably achillea 'Moonshine')
Yellow Flag Iris (iris pseudocorus)

When cutting the bouquet, I carried the vase out to the garden with a few inches of water to keep the stems as fresh as possible. I clean my pruners to make sure there is no soil or bacteria on the blades. By creating this arrangement as I went around the garden, it was easy to cut as many flowers as I needed for a full bouquet.

I didn't grow these flowers with the idea of a bouquet—the bi-color Dutch irises provided the key to the color scheme and everything else just fell into place.


(Note: The Dutch irises are not as blue as shown in the photo. They are deep violet which two different cameras and several settings could not accurately reflect without washing out the other flower colors.)

Words and photos by Freda Cameron, Defining Your Home, Garden and Travel.

April 1, 2010

Succulent Container Garden Update


It didn't take long for me to find the perfect sempervivum for my tabletop succulent container garden. In a previous story, I temporarily used an agave since I couldn't find the perfect sempervivum (Hens and Chicks) on my first shopping trip. Now, all of the plants used in the container are hardy for zones 3-9 with the same growing conditions.

Sempervivum 'Commander Hay' has replaced the agave as the focal point. 'Commander Hay' has the nice, deep merlot color that I wanted for the arrangement.

The other sempervivums include 'Icicle' (left) and 'Red Rubin' (right). A bit of blue sedum (center) from my garden was added for variety.


Words and photos by Freda Cameron, Defining Your Home, Garden and Travel. All company or product or patented names mentioned are registered trademarks/copyrights/patents owned by those respective companies or persons.

March 21, 2010

My First Succulent Container Garden


Home alone—at least one container garden won't need watering and tending when I go away on vacation. Reading Succulent Container Gardens by Debra Lee Baldwin inspired me to create my first project.

Not having prior experience beyond garden sedums, I decided to try a simple design and use an existing container.

For my project, I went to Big Bloomers Flower Farm in Sanford, North Carolina where I found a selection of succulents that are suitable for zone 7, with good drainage and full sun. I can overwinter the container on my front porch where the winter sun warms up the stone floor.

Using a terracotta container that stays on my outdoor teak dining table for three seasons, I chose a rustic color scheme. The sempervivum 'Red Rubin' and 'Icicle' echo the rust-burgundy colors of the weathering on the pot. The sempervivum, aka 'Hens and Chicks' are suitable for zones 3-9.

The emerald green agave bracteosa 'Calamar' works for zones 7-10 and is spineless and compact. Spineless meaning that you won't be injured by any sharp spiny agave points. It is underplanted with green sedum tetractinum that is hardy down to zone 5.

My original plan was to use the agave and sedum in a round, green-glazed pot so that the agave will have space to grow over the next year. It will mature at 2 feet—too large for the present home. However, since I underestimated the size of the terracotta container and didn't have enough sempervivum, the agave is temporarily in the same pot (for this story). Debra is careful to address fitting the size of the plants with the size of the pot.

I will do some rearranging of the plants after my next visit to the nursery so that the tabletop arrangement is all sempervivum—a design that I love in Debra's book. Sempervivum will multiply and the offspring can be separated from the mother plant.

Using Debra's very clear instructions for planting, I made a mix of potting soil and perlite from one of the "recipes" that she provided. After planting, there was soil and perlite on the plants, so I used a soft artist's brush to gently sweep away the debris. I carefully watered the soil.

According to Debra, the succulents should last about two weeks between waterings—enough time for me to slip away on vacation. I won't have to phone home to see if these plants are still alive!


Words and photos by Freda Cameron, Defining Your Home, Garden and Travel. All company or product or patented names mentioned are registered trademarks/copyrights/patents owned by those respective companies or persons.

March 20, 2010

Succulent Container Gardens: Book Review

I love container gardens stuffed with annuals for summer blooms, but I don't like leaving them unattended when I go on vacation. Creating a container garden takes imagination, time and expense—I don't want to come home to wilted or dead plants!

Until recently, I knew nothing about growing succulents—that can tolerate a couple of weeks without water. I live in North Carolina, not Southern California.

The idea of succulents as container plants never crossed my mind until I opened the book, Succulent Container Gardens by Debra Lee Baldwin.

I think my jaw dropped as I looked at the photos of gorgeous and creative succulent container designs! My husband and son looked over my shoulder as I stood at the kitchen island pointing out incredible colors, forms and arrangements. The guys "got it" as I read a few passages to them about the low-maintenance of succulents.

Sitting down to read the book, I learned about the varieties of succulents that will work in my climate. Debra's how-to instructions on choosing plants to work with pots convinced me to try my hand at creating my first succulent container garden.

Debra's planting instructions are easy to follow and include choices in soil mixture as well as tricks and tips for getting the plants into the container. I found out that a soft paint brush is needed to gently brush the soil mixture from the plants without any damage.

Debra provides many inspirational designs that are making me think outside the standard container—succulent wreaths and topiaries as well as interesting objects that can be used as containers—including birdbaths, bathtubs and shelves.

It is so easy for me to recommend a garden book that inspired me enough to do what is described within the book!

Review written by Freda Cameron.

Succulent Container Gardens by Debra Lee Baldwin was provided courtesy of Timber Press:
Debra has wowed the gardening world with her new book Succulent Container Gardens, now see Debra Lee Baldwin's exclusive DIY video showing the easy steps to making one of her swoon-worthy succulent designs.

February 1, 2010

Container Garden Recipes

It doesn't take a gardener to appreciate the beauty of containers. The perfect spot of color doesn't go unnoticed.

Shopping malls and streets often boast containers year-round. Many are planted with evergreens that get added punches of color from annuals and perennials with the changing seasons. You can find container garden inspiration everywhere.

Creating your own beautiful container garden is easy and you don't have to be a gardener to follow the instructions and have success.

There is no shortage of container garden "recipes" from magazines, growers and retailers. Many of these recipes are easy to find online. If you don't want to plant a container yourself, then you can purchase pre-planted container gardens at many nurseries. There are also many gardeners, garden centers and florists who specialize in creating custom containers.

Resources for recipes and container gardening tips:

Better Homes and Gardens
Fine Gardening
P. Allen Smith Garden Home
Proven Winners
Southern Living
Terra Nova Nurseries, Inc.

If you want the plants from published container garden recipes, you'd best shop early!

With everyone reading the same resources, the featured plants are the first to sell out. I bought most of my container annuals in March last year! In fact, the greenhouse owner told me that he'd be sold out of thousands of plants by the first week in April. Be prepared to have substitutions in mind, and remember that every container doesn't have to be elaborate. I keep my early purchases in a sheltered holding area until the freezes end in mid-April.

That said, you don't have to plant all of your containers in the spring. In late summer, when the garden is fading, the nurseries will be stocking fall-blooming plants so you can freshen up your porches and patios.

For all-season containers, try a small shrub, tree or rose that is interesting throughout the year. I have arborvitae in huge pots by my swimming pool; a potted miniature rose by my waterfall; and, a container herb garden in my front cottage garden. I let the annual grasses in my containers remain through the winter - though they lose their color and fade to tan, the structure provides interest in ice and snow.

A beautiful container can be the focal point instead of the flowers, too. I use a simple combination of purple petunias and basil on my outdoor dining table because I love the clay pot.

The basil and petunias are pinched back to keep the arrangement tidy and low so that we can have conversations across the table. The basil smells great and is edible, too. Basil, and other herbs make great companions to flowers.

Enjoy the fun and reward of creating your own container garden recipe!

My best tip for creating a container garden recipe of your own is to go to a nursery with a color scheme in mind. Pick your tall plant first to be your focal point - based on color, sun/shade and your container. Then, walk around with that plant until you see mounding plants, with the same growing conditions, that complement your focal point plant. Select one or two mounding plants, then try to find a plant that will spill over the edges. Sometimes, I just tilt a mounding plant in the pot so that it spills over the edge.

Be warned, container gardening is addictive - once you start, you'll have containers everywhere!

Click on the images for these container recipes


I'd love to see the container garden photos and recipes from other bloggers - so, please link in the comments.

Words and photos by Freda Cameron, Defining Your Home, Garden and Travel. All company or product or patented names mentioned are registered trademarks/copyrights/patents owned by those respective companies or persons.

August 2, 2009

Container Garden: Just Peachy In the Shade


How do you select plants and flowers for a container garden? I like to walk around acres of greenhouses to see what is interesting for the focal point! Yes, it is time-consuming, but a lot of fun - if you can find suitable plants.

Finding a tall, spiky plant for a shade container almost had me baffled for awhile until I asked for some help at the greenhouse. An indoor plant for my zone 7, Dracaena marginata 'Tricolor', was suggested for my pair of outdoor summer containers. Tropical zones can grow this one outside year round, but I will have to bring these inside to overwinter.

The beautiful colors in the Dracaena marginata 'Tricolor' gave me cues for companions. The green, white and peachy stripes of the leaves are easy to use in a centerpiece plant. I decided to look for peach blooms and headed for the impatiens section.

I found a gorgeous impatiens, Fusion Peach Frost, to use as an accent plant. These impatiens were a bit expensive, so I purchased only one for each container. Little did I know that only one of these plants would later take over the large containers to steal all the attention! This is an annual that mounds beautifully and blooms non-stop. The delicate peach blossoms have a darker peach throat. The hummingbirds buzz up onto the front porch to sip from these lovely plants!

Keeping the budget in mind for the fillers, I selected a cell-pack of begonias for the waxy leaves with deeper orange-pink blooms than the impatiens. This is another annual with blooms that are loved by the hummingbirds.


Merlot Coleus adds a touch of darkness while Red Ruffles provides a touch of orange-red foliage. I already had Red Ruffles growing in my garden, so I lifted a plant or two to stuff the container a bit more.

When I say "stuff" a container, that is what I typically do for annual plantings. However, in the case of using this large impatiens, it's a good thing that I used only one!


For comparison and growth rate, the top photo was taken in late June, one month after planting the containers. The bottom photo was taken in late July, two months after planting. I used a good potting mix and have not fertilized the plants at all since planting in late May. Only the coleus have been pinched back to prevent blooms.

Photos and words by Freda Cameron

June 12, 2009

Update on the Purple Container Garden


I've gone overboard with container plantings! I was reading about Rob's Plants in Pots in his garden in France and stopped to think about how many pots that I've planted this year (at least 17).

As long as the rain continues to fall on a regular basis, there should be no problem. I had abandoned container gardening in 2008 for fear of another drought like the one in 2007 when I lost most everything planted in pots.

In April, I planted three large containers with a purple color scheme (see story Container Garden: Purple, Purple and More Purple for "before" photos and a list of plants used).

I've been pleased with the progress and the design of the container plantings. The color combination looks great and all the plants are happy and healthy. I made one plant change since the original potting on April 9. I had pink gomphrena planted in the garden, but it was a favorite snack of the rabbits, so I moved those annuals to the containers.

These fragrant, purple petunias have to be pinched back occasionally to keep the plants full, but everything else is carefree. The Persian Shield is holding up to the full sun location, but the other plants in the pots and in the garden, do provide a bit of shelter.


Story, container design and photos by Freda Cameron; Location: home garden; June 2009

April 10, 2009

Container Garden: Purple, Purple and More Purple

Too much of a good thing? I decided to go with a purple color scheme for my three large containers that are in full sun along the garden paths.

I chose purple because it won't be washed out in the sunshine. Purple works well with any other color growing in my garden. In other words, I consider purple to be neutral as it looks good with white, silver, pink, red, yellow and orange.

The stone in our house foundation, porch and fence corners has purple tones. Putting white or yellow against the stone doesn't work. Our flagstone (used on the main path and porch/patio floors) is actually called Pennsylvania Bluestone Lilac Heather. The paint on our house is a sage green/gray and purple looks good against that color, too.

One pot is outside the cottage garden fence at the entrance gate. There is a coordinating pot at the beginning, and another at the end, of the grit path beside the Knock Out® Roses 'Radrazz'.

The plants that I used in all three containers grow well in full sun. The two containers inside the fence are 16 inches and the one outside is 20 inches.

Pennisetum setaceum 'Rubrum'
(Purple fountain grass, zones 8-11)
1 plant

Strobilanthes dyerianus
(Persian shield, zones 9-11)
1 plant

Tanacetum ptarmiciflorum
(Silver Lace Bush, zones 8-10)
1 plant

Lantana montevidensis
(Purple trailing lantana, zones 9-11)
1 plant in 16" containers, 2 in 20" container

Ageratum houstonianum 'Tycoon® Purple'
(Floss flower, zones 9-11)
used as many as needed for filler in each container

Petunia grandiflora
(Petunia, not hardy)
3 plants for each of the 16" containers; none in the 20"

These plants like the same conditions. There is a balance of foliage plants and blooming flowers. The pennisetum will grow tall in the middle, while the trailing lantana will spill over the edges. The ageratum will fill out the middle. I still have to watch for the danger of frost, but since these annuals are planted in containers, we can move them inside the garage for protection.

Newly planted container gardens look sparse for a few weeks. It won't be long before these annuals fill out to make a stronger statement. Annuals need regular feeding to ensure robust growth.

For the container outside the fence, I chose deer resistant annuals. I repeated the same plants inside the fence because the view is of all three containers. All annuals were chosen to perform well from spring until the first frost in the autumn.

Story, design and photos by Freda Cameron

Freelance travel writer. My current fiction writing projects include a completed manuscript and several works in progress.

By the way, my name is pronounced fred-ah, not freed-ah. Thank you.

Subscribe Now:

Followers

Click Pic for Travel Stories

Click Pic for Travel Stories
Paris, France; September 2013

The Musician. My late husband

The Musician. My late husband
Paris 2011